
Labeling queues turn raw agent traces, dataset rows, or SQL query results into datasets of labeled examples. Humans review each item, edit the target, approve what looks right, discard what doesn’t, and push the approved batch into a dataset when they’re ready.Documentation Index
Fetch the complete documentation index at: https://laminar.sh/docs/llms.txt
Use this file to discover all available pages before exploring further.
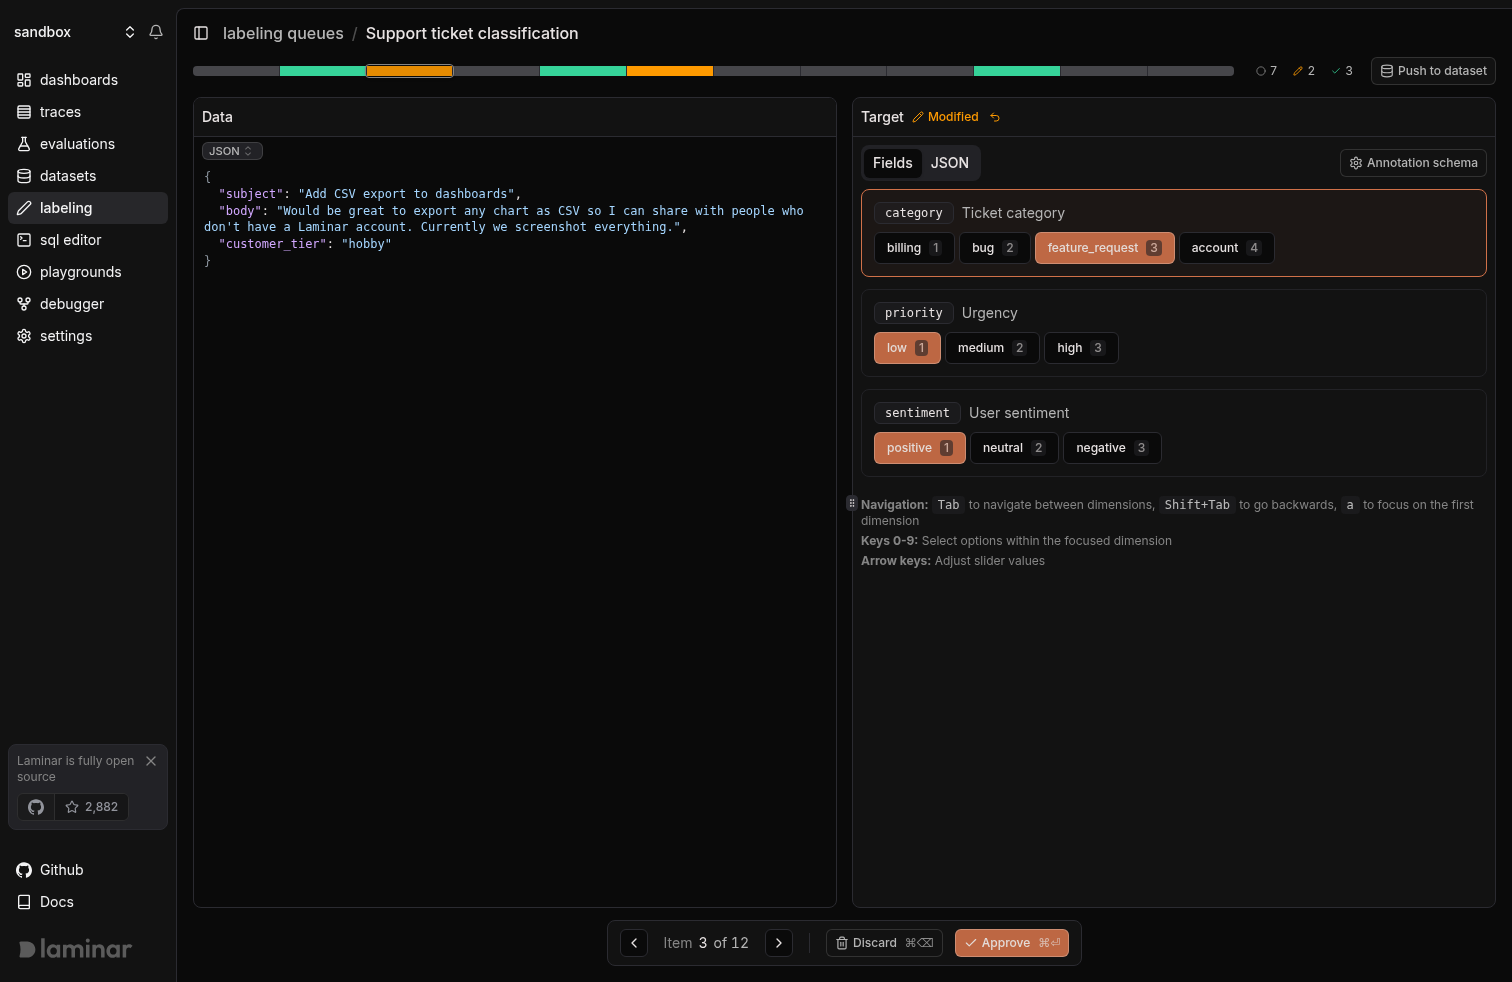
How the queue works
A queue holds items that share the shape of a dataset datapoint: adata object, a target, and optional metadata. You move through items one at a time; each item lives in one of three states:
- New: seeded from the source and not yet touched.
- Modified: the target has been edited. Edits save automatically; no approval yet.
- Approved: explicitly signed off. Approved items are what you push to a dataset by default.
The interface
The navigator bar
The colored bar at the top of the page is both a progress overview and the primary way to jump around the queue. Each item gets one segment: muted for new, amber for modified, green for approved. The counters on the right show the totals. Click or drag anywhere on the bar to jump to that item, which is useful for coming back to the first modified item or spot-checking your approvals before a push.Data panel
The left panel shows the current item’s full payload (data, target, metadata). It’s read-only: the ground truth you’re labeling against.
Target panel
The right panel is where you write the label. Two tabs:- JSON: the raw JSON written to the
targetfield. Syntax-highlighted; invalid JSON disables the Approve button. - Fields: if you’ve defined an annotation schema, the queue renders a structured form (string, number, boolean, enum) with
1–9hotkeys. Tab moves between fields, arrow keys adjust sliders,afocuses the first field.
Approval status and revert
Once you edit an item, a Modified badge appears next to the Target header with an undo button that drops your edits back to the original target. Approving clears the modified state; unapproving returns the item to modified so you can edit again.Labeling an item
Review the data
Read the payload on the left. If the queue was seeded from a span,
data holds the span input and target holds the span output.Edit the target
Fix the JSON on the right, or fill out the structured fields if a schema is defined. Edits save automatically after a short debounce.
Approve, discard, or move on
- Approve (
⌘⏎) signs the item off and advances to the next one. - Discard (
⌘⌫) removes the item from the queue entirely. - Prev / Next (
⌘←/⌘→) navigates without committing, which is useful for comparing similar items.
Keyboard shortcuts
| Shortcut | Action |
|---|---|
⌘⏎ | Approve current / unapprove if already approved |
⌘⌫ | Discard current |
⌘← / ⌘→ | Previous / next item |
Tab / Shift+Tab | Move between fields (Fields tab) |
1–9 | Select option in focused field |
a | Focus the first field |
⌘⏎ also fires inside the JSON editor and text inputs, so you can approve without blurring first.
Push to a dataset
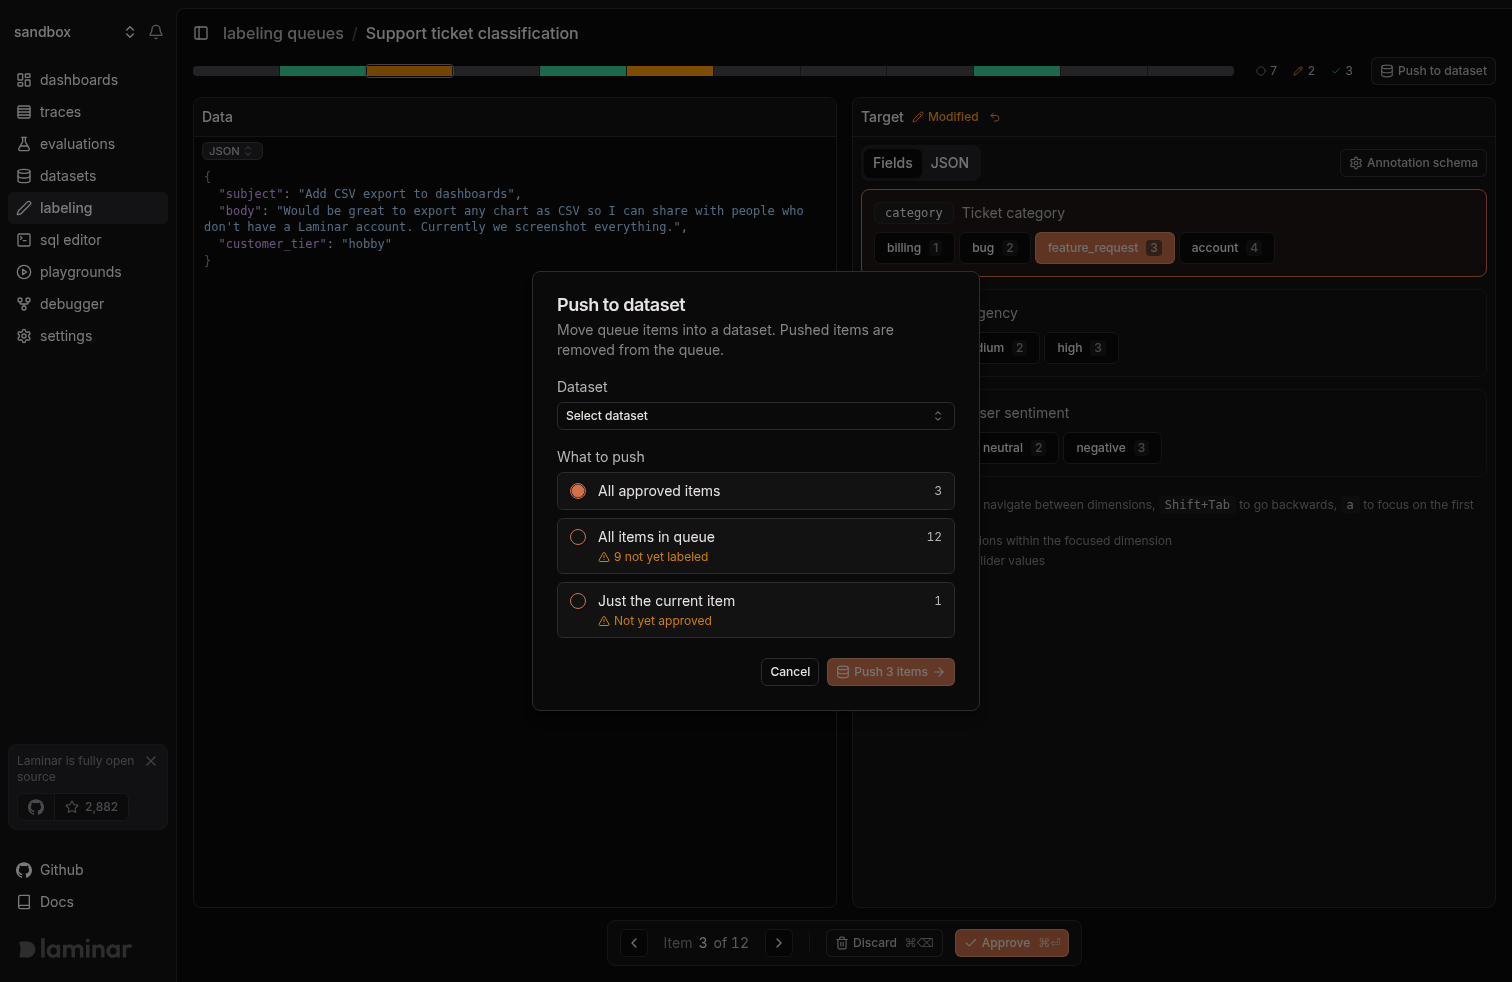
Push is always an explicit action. Open the Push to dataset dialog, pick a target dataset, then choose the scope:- All approved items: the default. Pushes every item currently in the
Approvedstate. - All items in queue: pushes everything regardless of approval. Unapproved items carry whatever target they currently hold.
- Just the current item: pushes only the item you’re viewing.
data / target / metadata shape.
Add items to a queue
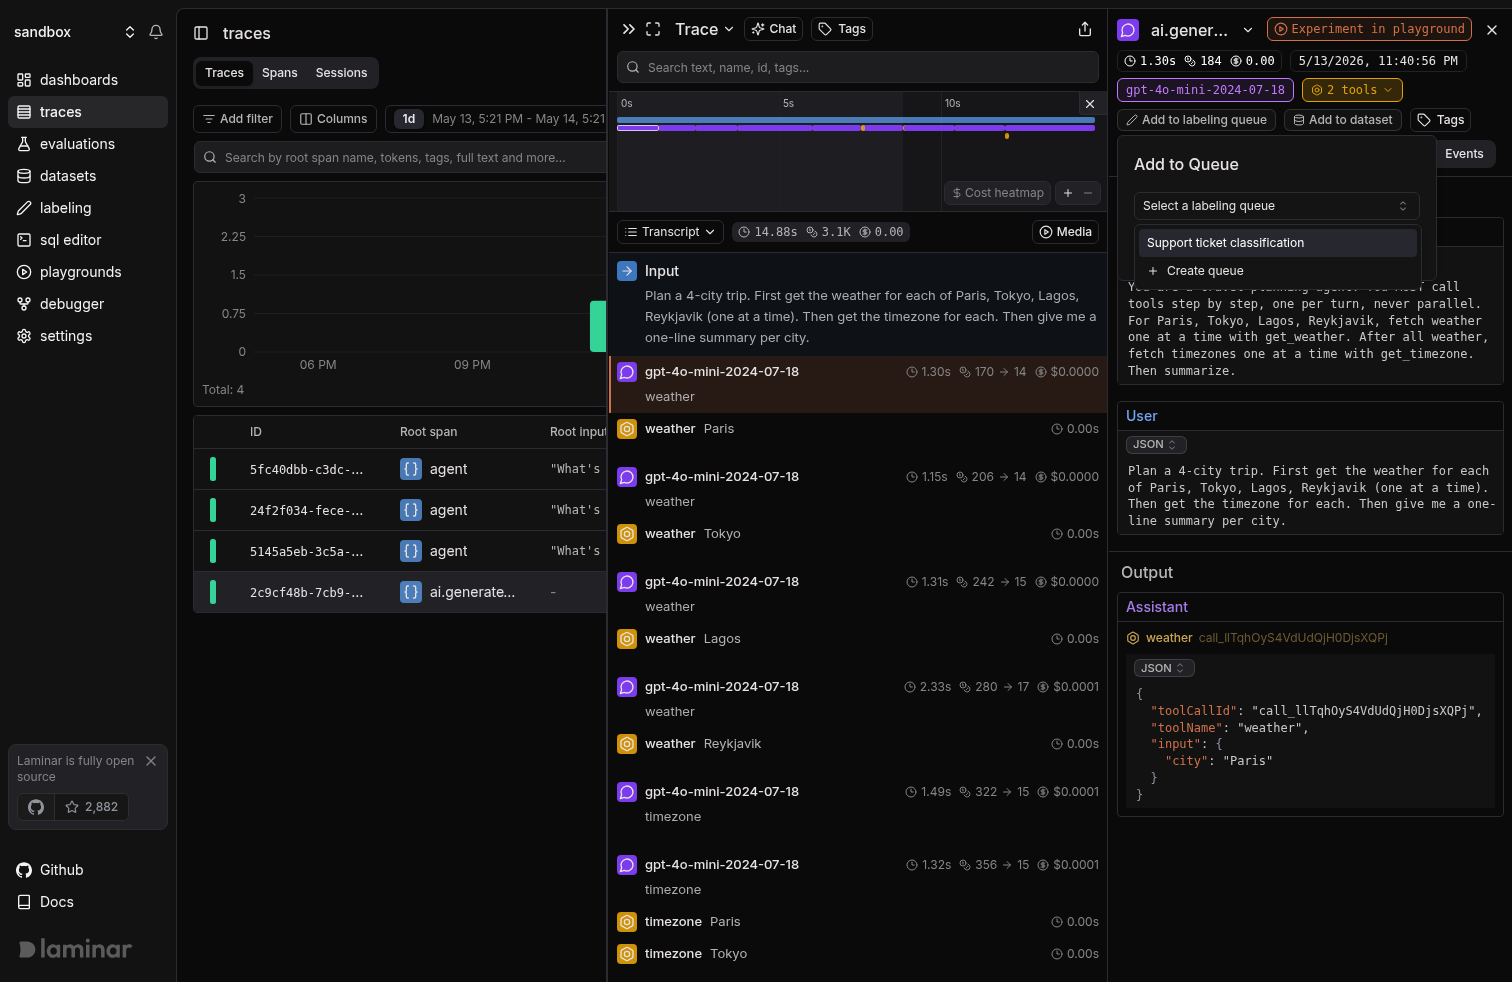
From a span
Open a span in the trace view and use Add to labeling queue. The span’s input becomes the item’sdata, its output becomes the target. Good for capturing real agent behavior you want a human to correct.
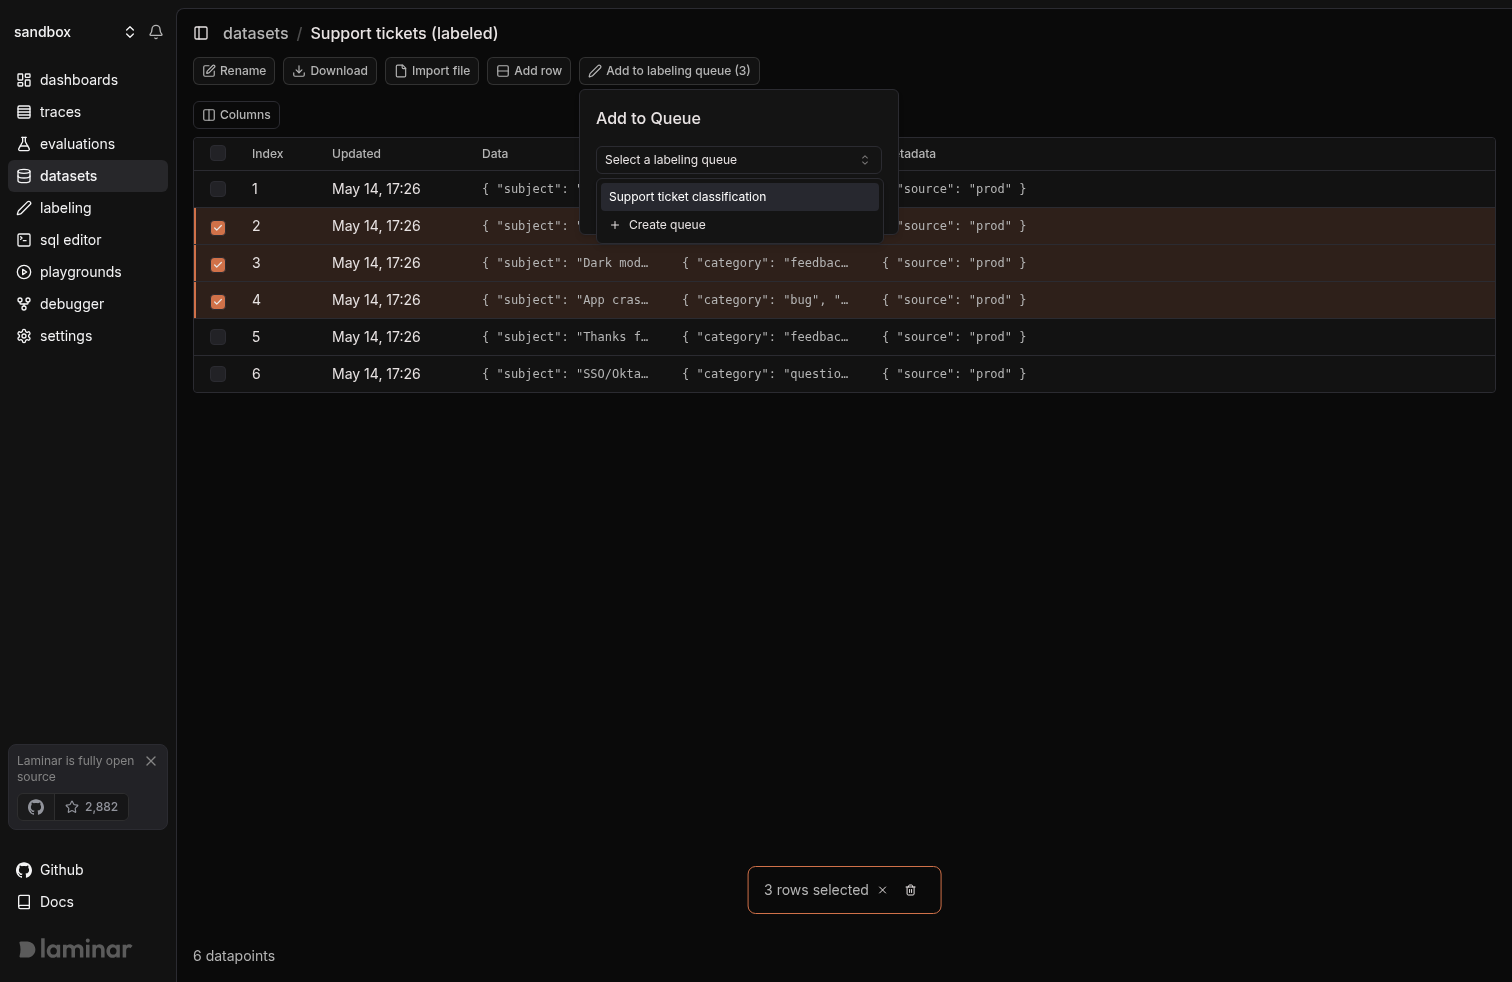
From a dataset
Select one or more datapoints in a dataset and push them into a queue. The datapoint’sdata / target / metadata map directly onto the queue item.
From the SQL editor
Run any query in the SQL editor, then open Export → Export to Labeling Queue. Drag each result column into Data, Target, or Metadata and push. This is the fastest way to turn a slice of real traces into a labeling batch: filter to the failures you care about in SQL, ship them to a queue, label them.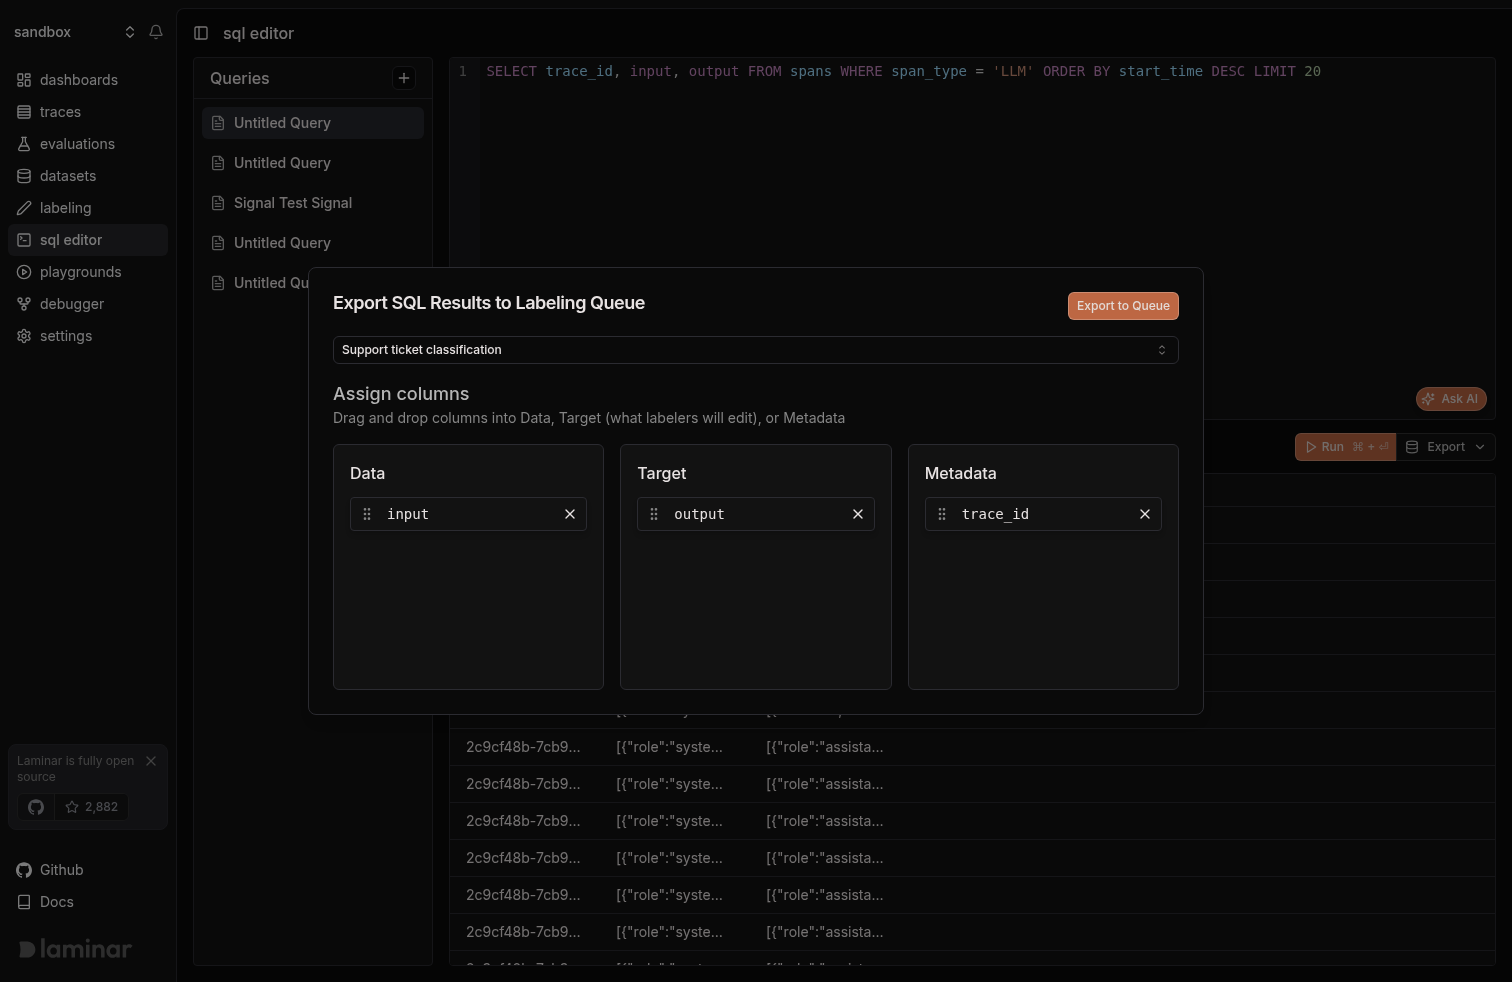
Via API
POST https://api.lmnr.ai/v1/labeling_queues/{queue_id}/items adds items programmatically. See API reference below.
Annotation schemas
An annotation schema turns the Target tab into a structured form so labelers can work at keyboard speed. Define fields in the queue settings; each field has akey, a type (string, number, boolean, enum), a description, and type-specific options (number min/max, enum values).
API reference
Push items to a labeling queue
POST https://api.lmnr.ai/v1/labeling_queues/{queue_id}/items
Adds one or more items to an existing labeling queue. queue_id is the queue’s UUID; find it in the URL of the queue page.
Headers
| Header | Value |
|---|---|
Authorization | Bearer <PROJECT_API_KEY> |
Content-Type | application/json |
| Field | Type | Required | Description |
|---|---|---|---|
items | array | yes | One or more items to add. |
items[].data | any JSON | yes | The input shown to the labeler. |
items[].target | any JSON | yes | The initial target. Labelers edit this. |
items[].metadata | object | no | Arbitrary JSON object carried alongside the item. |
items[].idempotencyKey | string | no | A stable id for the item. Retrying with the same (queue_id, idempotencyKey) is a no-op. |
201 Created with an array of the inserted items:
What’s next
Add items to a dataset
Push approved queue items into a dataset for evals or fine-tuning.
Query traces with SQL
Filter to the traces you want labeled, then export them to a queue.